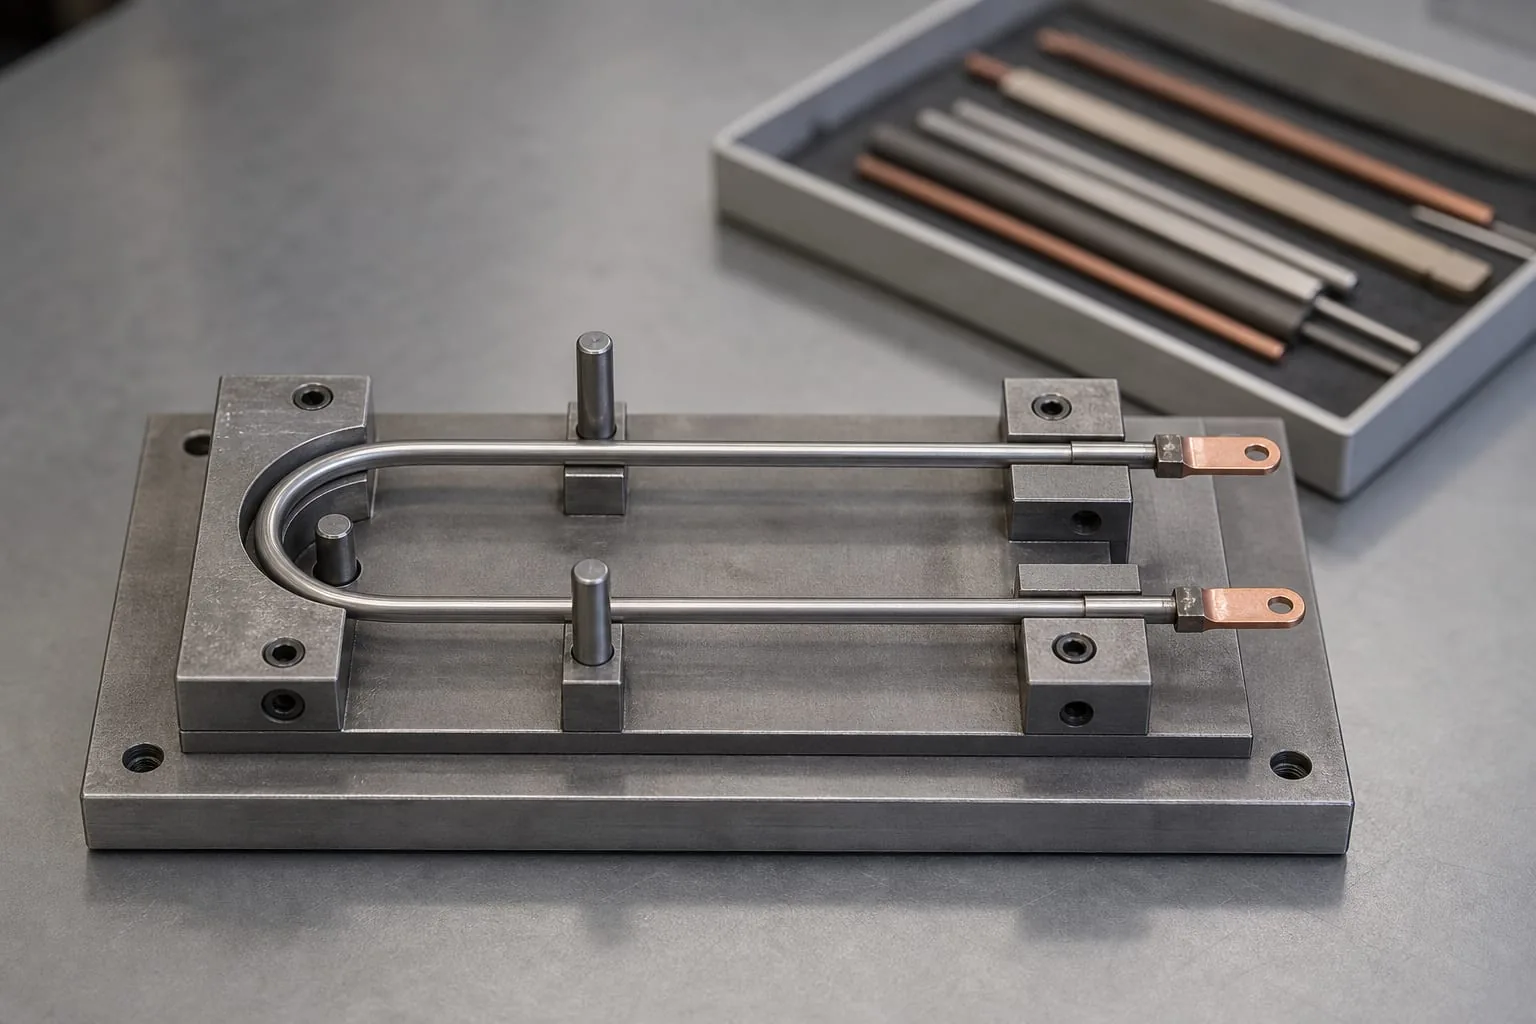
Heat sealing wire is a small component with a very specific job: it must produce the right heat, in the right place, for the machine and sealing material. A replacement that merely looks close can still have the wrong electrical resistance, heated length, profile or termination.
For maintenance and purchasing teams, the safest approach is to identify the complete element rather than order by a loose description. This guide explains the details worth recording, the checks to make before removal and the evidence that helps a supplier confirm compatibility.
What heat sealing wire does
A resistance element turns electrical energy into heat. The machine’s controller and power supply are designed around a particular element, while the element’s material, length and cross-section influence its resistance. The broader guide to heat seal elements and wires explains how the element fits into the full sealing assembly.
The Kanthal resistance-heating handbook shows that resistance per metre depends on resistivity and cross-sectional dimensions. For round wire, diameter is part of the calculation. For strip or ribbon, width and thickness both matter. This is why changing one dimension can change electrical behaviour even when the new part still fits between the terminals.
Impulse sealers energise the element for part of each cycle, followed by a cooling period. Constant-heat and continuous systems use different element arrangements and control methods. Do not assume that a wire sold for one type can be moved to another without the machine manufacturer’s specification.
Round wire, flat ribbon and formed profiles are not interchangeable
Heat sealing elements can be made as round wire, flat ribbon or a formed profile. The correct choice is determined by the original equipment and the seal it was designed to produce.
- Round wire creates a narrow line of contact and is used in compatible wire-type, continuous and rotary sealing arrangements.
- Flat ribbon presents a wider contact face. Its width and thickness must both match the intended assembly.
- Formed elements include bends, cut-outs and terminations positioned for a particular jaw, bar or mounting pattern.
Heat Seal Components supplies made-to-specification heat seal elements and custom impulse heat seal elements. A drawing, an intact sample or clear measurements are more useful than a description such as ‘standard sealer wire’.
Five measurements that define a replacement
Measure the old element only after the machine is safely isolated and the part has cooled. If the element has stretched, fractured or lost its original shape, use the machine manual, a drawing or an undamaged spare as the primary reference.
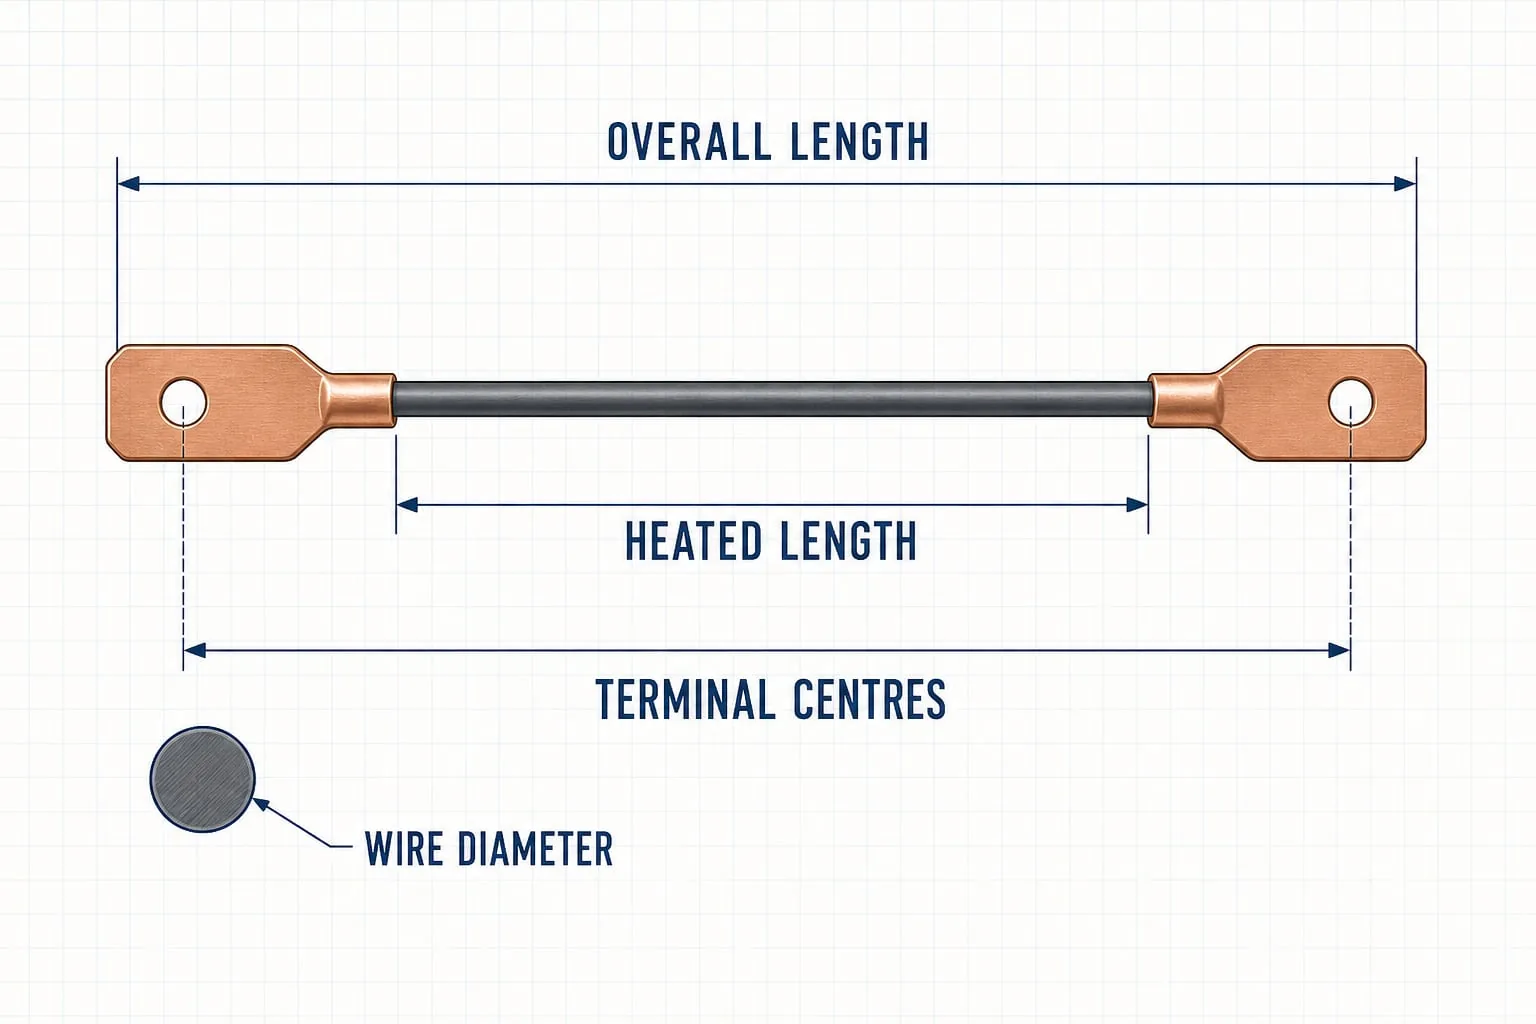
- Overall length: record the full end-to-end dimension, including the terminations where the drawing requires it.
- Heated length: identify the active resistance section between the terminations. This is not always the same as overall length.
- Cross-section: for round wire, record diameter. For ribbon, record both width and thickness in millimetres.
- Terminal centres: measure between the centres of mounting holes or other fixed reference points, not between convenient outside edges.
- Profile and fixing details: record bends, radii, offsets, eyelets, tags, leads, holes and the orientation of each termination.
A photograph taken square to the part, with a scale beside it, helps communicate shape. It should support measured dimensions rather than replace them. Include a close-up of each end because termination geometry is often the deciding fit detail.
Why small dimension changes matter
Two elements can share the same overall length yet behave differently. A small change in wire diameter, or in ribbon width or thickness, changes the cross-sectional area. A different alloy can change resistivity. A shorter or longer heated section changes how much resistance is distributed across the working span.
The result may be different current draw or heat distribution, but the exact outcome depends on the machine and control circuit. Do not compensate for an uncertain element by guessing a timer or temperature setting. Confirm the specified part first, then set up the machine using its documented procedure.
Thermal expansion can matter too. Fuji Impulse, for example, describes a low-expansion element used in specific compatible models to reduce stress and breakage. That is a model-specific design choice, not a universal substitute for every impulse sealer.
Inspect the wire, terminations and support parts
A broken element is sometimes the final symptom rather than the only fault. Inspect the surrounding assembly before fitting a replacement.
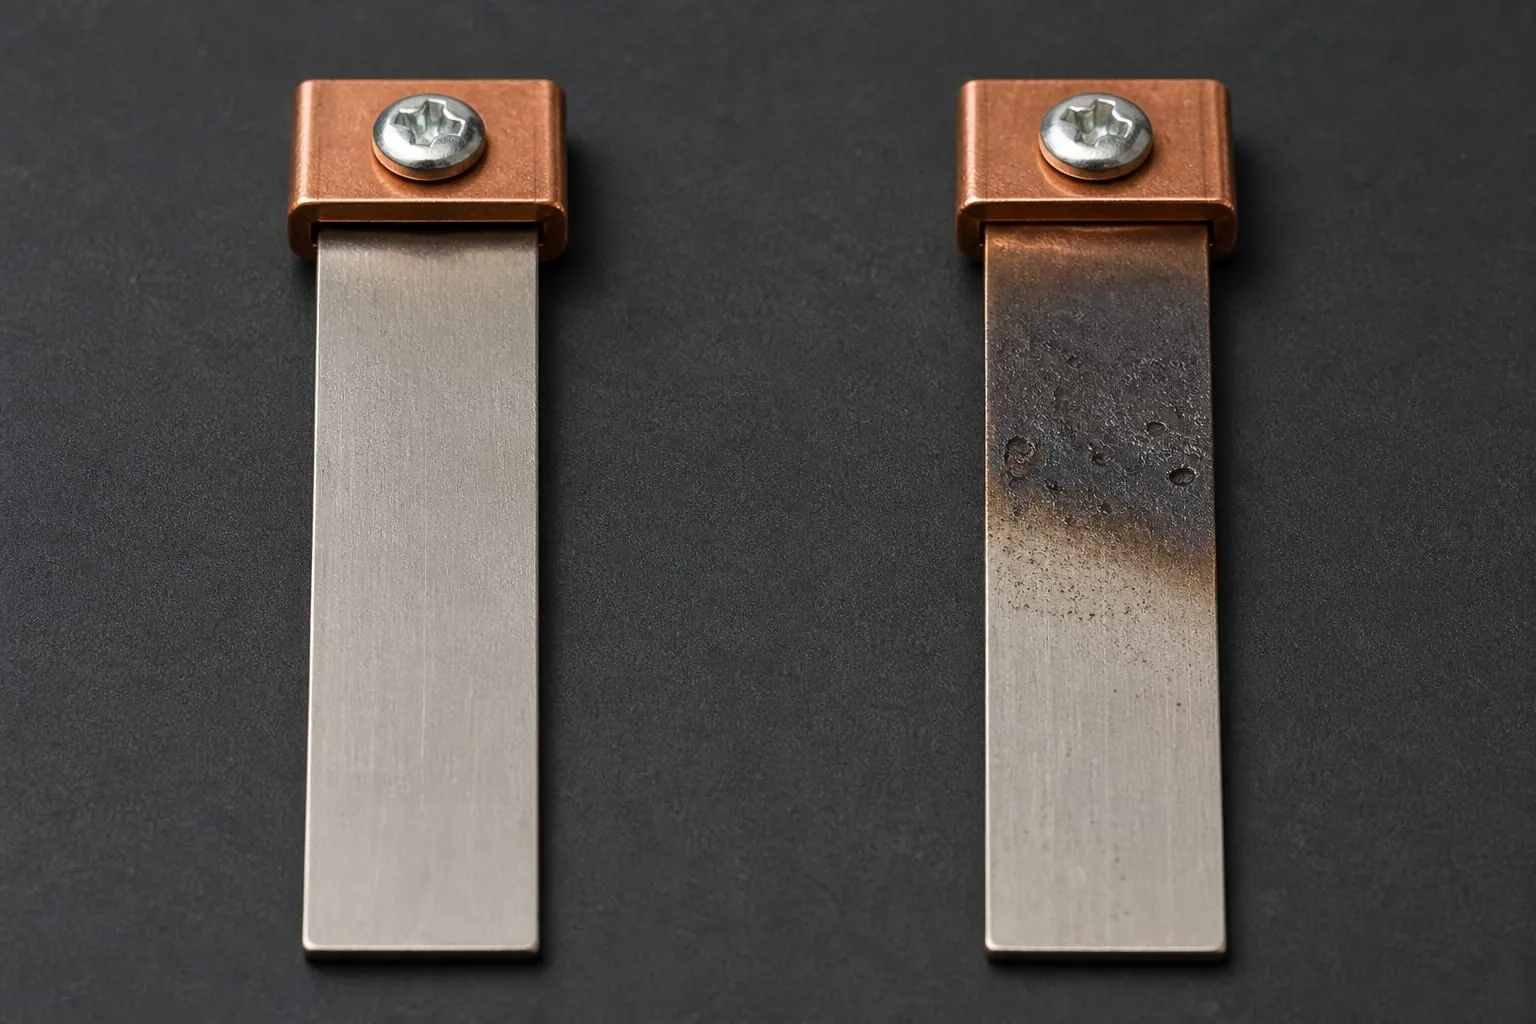
- Look for local thinning, pitting, distortion or a break in the active span.
- Check terminal areas for darkening, arcing marks, loose fasteners or a contact surface that is no longer flat.
- Inspect insulating washers, backing material and covers for damage or displacement.
- Check that the element sits evenly and is not rubbing an edge, pinched under a clamp or pulled out of alignment.
Where the assembly uses a non-stick cover, damaged or contaminated PTFE heat seal tape can affect release and expose the element. Also check the condition and alignment of the sealing jaws rather than treating every poor seal as an element fault.
Safe checks before removing the old wire
Follow the machine manufacturer’s maintenance procedure. The Health and Safety Executive advises making equipment safe before maintenance, including isolation from power where appropriate, locking off where necessary, allowing hot parts to cool and using competent people for the work.
- Stop the machine and isolate all relevant energy sources.
- Allow the sealing area to cool before touching or measuring components.
- Photograph the installed routing, orientation and terminal arrangement before loosening anything.
- Label connections and retain any approved washers, insulators and fixings in their correct order.
- Do not carry out live resistance or continuity tests unless the machine procedure explicitly requires them and the person is competent to do so.
Common fault patterns and what they may indicate
Visual evidence helps narrow the investigation, but it is not proof of a single cause. Record the condition before cleaning or discarding the failed part.
- A clean open break may indicate fatigue, excessive tension or repeated movement.
- A darkened or pitted area beside a terminal may point to a poor connection, contamination or local overheating.
- Sagging or a changed profile may be associated with loss of tension, mechanical restraint or unsuitable operating conditions.
- Repeated failure in the same position suggests checking alignment, supports, terminal contact and the specified element before fitting another replacement.
If seal quality is inconsistent but the element is intact, inspect the whole sealing stack. Pressure, dwell, cooling, jaw condition, cover material and product contamination can all affect the result.
What to send for a replacement quote
A complete information pack reduces back-and-forth and gives the supplier a better basis for checking compatibility.
- Machine manufacturer, model, serial number and the exact sealing station.
- Element form: round wire, ribbon, straight element or formed profile.
- Overall length, heated length, cross-section, terminal centres and fixing details.
- Clear photographs of the full element, both terminations and the installed arrangement.
- An original drawing, part number or undamaged sample where available.
- The packaging material and the observed failure, stated without guessing at a cause.
For unusual assemblies, Heat Seal Components can review custom heating elements as well as standard replacement requirements. Contact Heat Seal Components with the machine details, measurements and photographs so the team can assess the component rather than rely on appearance alone.